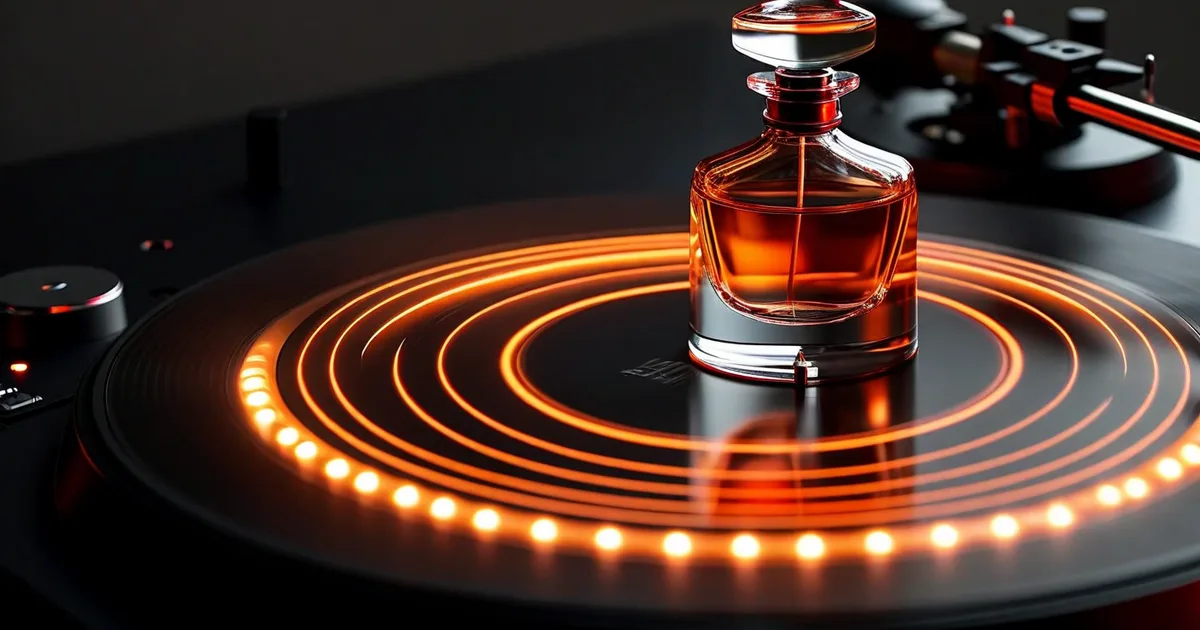
Why 360-Degree Product Packshots Matter in 2024
Online shoppers cannot pick up your product, rotate it in their hands, or inspect the stitching on the back. That tactile gap costs e-commerce businesses billions in returns and lost sales every year. A 360-degree product packshot bridges that gap by letting customers spin a product on screen, examining it from every angle.
The numbers speak for themselves:
- Conversion rates increase by 10–40% when 360-degree views replace static images (source: Adobe Commerce studies).
- Product returns drop by up to 50%, because buyers make better-informed decisions.
- Time on page increases by 28% on average, sending positive engagement signals to search engines.
Whether you sell jewelry, electronics, furniture, or fashion accessories, mastering interactive product photography is no longer optional—it is a competitive necessity.
This guide walks you through the entire process: equipment selection, shooting workflow, post-production, web integration, and performance optimization.
Essential Equipment for 360-Degree Packshots
Camera Selection
You do not necessarily need a $5,000 camera body, but you do need manual control over exposure, white balance, and focus. Consistency across all frames is paramount; even slight variations in brightness or color will produce a flickering, amateurish spin.
Recommended cameras by budget tier:
| Budget Tier | Camera Example | Sensor | Why It Works |
|---|---|---|---|
| Entry (~$800) | Canon EOS R50 / Nikon Z50 | APS-C | Excellent image quality, full manual control, tethering support |
| Mid-range (~$2,000) | Sony A7 IV / Canon EOS R6 II | Full-frame | Superior dynamic range, better low-light performance, robust tethering |
| Professional (~$3,500+) | Canon EOS R5 / Sony A7R V | Full-frame high-res | 45–61 MP for extreme detail, ideal for zoom-in features |
The key takeaway: any camera with manual mode and tethered shooting capability can produce professional 360-degree packshots.
Lens Choice
A macro or standard prime lens in the 50–100mm range is ideal for most products. Primes deliver sharper results and consistent distortion characteristics across frames. Avoid wide-angle lenses—barrel distortion will warp the product differently depending on its orientation, making the spin look unstable.
Recommended options:
- Canon RF 100mm f/2.8L Macro – superb sharpness, ideal for small to medium products
- Nikon Z 50mm f/1.8 S – affordable, sharp, lightweight
- Sony FE 90mm f/2.8 Macro G OSS – excellent for detail-rich packshots
Turntable
The turntable is the heartbeat of 360-degree photography. You need precise, repeatable angular increments.
- Motorized programmable turntables (Ortery PhotoCapture 360M, Iconasys Shutter Stream) automate rotation and camera triggering. They can cost $500–$3,000 but save enormous time.
- Manual turntables with degree markings (Foldio360, DIY solutions) work for tighter budgets but require discipline.
For most professional workflows, a motorized turntable that integrates with your tethering software is the best investment.
Lighting Setup
Consistency is everything. Use continuous LED lighting or strobes with consistent color temperature.
A typical two-light packshot setup includes:
- Key light (45° to the left or right, diffused through a softbox)
- Fill light (opposite side, lower power, or reflected with a white bounce card)
- Optional backlight or a light tent/cube for highly reflective products
For small to medium products, a 70cm light tent with two 5500K LED panels delivers clean, even illumination with minimal reflections.
The Shooting Workflow: Step by Step
Step 1 — Calibrate Your Environment
Before placing the product, set up your scene:
- Mount the camera on a sturdy tripod at the exact height of the product center.
- Set manual white balance using a gray card.
- Lock focus manually on the product’s front face.
- Set a narrow aperture (f/8–f/11) for maximum depth of field.
- Use a low ISO (100–200) to minimize noise.
- Shoot in RAW for maximum editing flexibility.
Step 2 — Determine Your Frame Count
The number of frames dictates the smoothness of the spin:
| Frames | Interval | Smoothness | File Size Impact |
|---|---|---|---|
| 24 | 15° | Acceptable for simple shapes | Low |
| 36 | 10° | Good — industry standard | Medium |
| 72 | 5° | Very smooth — premium feel | High |
| 120 | 3° | Ultra-smooth — luxury products | Very high |
36 frames at 10° intervals is the sweet spot for the vast majority of e-commerce applications. It delivers a smooth experience while keeping total image payload under 3–5 MB when optimized.
Step 3 — Shoot the Sequence
- Place the product on the turntable center.
- Trigger the turntable to rotate by the chosen interval.
- Capture each frame via tethered shooting (Lightroom, Capture One, or manufacturer software).
- Repeat until you complete 360°.
- Do not touch the camera, lighting, or product between frames.
With a motorized turntable and tethered trigger, shooting 36 frames takes under 3 minutes per product.
Step 4 — Multi-Row Shooting (Optional)
For full spherical 360-degree views (not just horizontal spin), repeat the sequence at different camera heights—typically at -30°, 0°, and +30° elevation. This produces a 3-row matrix (108 frames for 36-per-row) that viewers can navigate both horizontally and vertically.
This technique is commonly used for complex products like shoes, electronics, or luxury watches.
Post-Production Workflow
Batch Editing in Lightroom or Capture One
- Import all RAW frames.
- Edit the first frame for exposure, contrast, white balance, and sharpening.
- Sync or copy-paste the settings to all remaining frames.
- Crop identically across the entire set.
- Export as JPEG at 80–85% quality or WebP for web-optimized delivery.
Target output resolution: 1000–1500px on the longest side for standard e-commerce use. For zoom-enabled viewers, export at 2000–3000px.
Background Removal
Clean white backgrounds (or transparent PNGs) are standard for packshots. Options include:
- Physical white sweep during shooting (easiest, fastest)
- Automated background removal using Photoshop Actions, Remove.bg API, or Pixelcut
- Manual clipping paths for complex outlines (time-consuming but pixel-perfect)
At Lueur Externe, our e-commerce teams routinely process hundreds of 360 packshots with automated pipelines that combine Lightroom batch processing with script-driven background removal, ensuring pixel-perfect consistency at scale.
Image Optimization for Web
Every frame must load fast. Multiply a single image’s weight by 36 or 72 and you understand why optimization is critical.
Target per-frame file sizes:
- Standard JPEG: 40–80 KB per frame (36 frames ≈ 1.5–2.9 MB total)
- WebP: 25–50 KB per frame (36 frames ≈ 0.9–1.8 MB total)
- AVIF: 15–35 KB per frame (36 frames ≈ 0.5–1.3 MB total)
Use tools like ImageOptim, Squoosh, or a build-step script with Sharp (Node.js) to batch-convert and compress.
Web Integration: Building the Interactive Viewer
Choosing a 360 Viewer Library
Several JavaScript libraries and SaaS solutions can display your image sequence as an interactive spin:
- Sirv 360 Viewer — SaaS, easy setup, CDN-hosted, used by major retailers
- Magic 360 by Magic Toolbox — lightweight plugin, compatible with most CMS platforms
- Three.js — open-source 3D library, maximum customization, steeper learning curve
- JS-Cloudimage-360-View — free, lightweight, open-source
- React-360-product-viewer — for React-based e-commerce frontends
Basic Implementation with JS-Cloudimage-360-View
Here is a minimal implementation you can drop into any HTML page, WordPress template, or PrestaShop product page:
<!-- Include the library -->
<script src="https://cdn.jsdelivr.net/npm/js-cloudimage-360-view@3/dist/js-cloudimage-360-view.min.js"></script>

<!-- 360 Viewer Container -->
<div
  class="cloudimage-360"
  data-folder="/images/packshots/product-001/"
  data-filename="frame-{index}.jpg"
  data-amount="36"
  data-speed="80"
  data-autoplay="true"
  data-autoplay-reverse="false"
  data-spin-reverse="false"
  data-full-screen="true"
  data-magnifier="2"
  data-bottom-circle="true"
  data-bottom-circle-offset="5"
  data-lazyload="true"
  data-drag-speed="150"
  style="width: 100%; max-width: 800px; margin: 0 auto;"
></div>
This configuration assumes your images are named frame-1.jpg through frame-36.jpg and stored in a dedicated folder. The data-lazyload attribute ensures frames load progressively, while data-magnifier enables a 2x zoom on hover.
PrestaShop and WordPress Integration Tips
For PrestaShop:
Create a custom module or override the product template (product.tpl or the corresponding Smarty/Twig file in your theme) to inject the viewer container and script. Store the 360-image folder path as a custom product field or in a dedicated database table.
For WordPress / WooCommerce:
Use a shortcode approach. Register a shortcode [packshot_360 folder="/images/product-001/" frames="36"] that outputs the viewer HTML. Enqueue the JS library conditionally on product pages only to avoid unnecessary script loading elsewhere.
Agencies with deep CMS expertise, like Lueur Externe—a certified PrestaShop partner and WordPress specialist since 2003—can build robust, reusable 360-viewer modules that integrate seamlessly with your existing product catalog, inventory system, and CDN infrastructure.
Performance Optimization Checklist
Serving 36–72 images per product can severely impact page speed if not handled carefully. Follow this checklist:
- Use WebP or AVIF format with JPEG fallback
- Lazy-load the viewer — only initialize when the element enters the viewport
- Serve images via CDN (AWS CloudFront, Cloudflare, Fastly)
- Enable HTTP/2 or HTTP/3 for multiplexed image loading
- Preload the first frame as a static product image for instant visual feedback
- Sprite sheets — some viewers support combining all frames into a single large image to reduce HTTP requests (effective for ≤36 frames)
- Set appropriate cache headers (Cache-Control: max-age=31536000 for versioned assets)
- Compress with Brotli or Gzip at the server level
Sprite Sheet Approach
Instead of 36 individual files, you can stitch all frames into a single sprite sheet (6 columns × 6 rows, for instance). The viewer then repositions the background to show each frame. This reduces network requests from 36 to 1, significantly improving load time on HTTP/1.1 connections.
Tools like ImageMagick make sprite generation trivial:
montage frame-*.jpg -tile 6x6 -geometry 800x800+0+0 sprite-sheet.jpgThis creates a 4800×4800 pixel sprite (6×800 by 6×800) containing all 36 frames.
SEO Considerations for 360-Degree Packshots
Interactive visuals are powerful for users, but search engines still rely on text and metadata. Do not forget these SEO fundamentals:
Image SEO
- Name files descriptively:
red-leather-handbag-360-frame-01.jpgnotIMG_4392.jpg. - Add alt text to the first (static preview) frame: “Red leather handbag — 360-degree interactive view.”
- Use structured data (Product schema) with the
imageproperty pointing to the preview frame.
Page Speed
Google’s Core Web Vitals directly affect rankings. A poorly optimized 360 viewer that blocks the main thread or delays Largest Contentful Paint will hurt your SEO. Lazy-loading and CDN delivery are non-negotiable.
Engagement Signals
The increased time-on-page and lower bounce rate generated by interactive 360 views send positive behavioral signals that can indirectly boost your organic rankings.
Common Mistakes to Avoid
- Inconsistent lighting between frames — Even a 0.1-stop variation creates visible flicker. Lock everything to manual.
- Product shifting on the turntable — Use museum putty or adhesive dots to secure the product.
- Too few frames — Under 24 frames looks choppy and unprofessional.
- Ignoring mobile — Over 60% of e-commerce traffic is mobile. Test your viewer on touch devices for smooth drag-to-spin behavior.
- No fallback — If the JS library fails to load, show a static high-quality image instead of a blank container.
- Oversized images — Serving 4000px frames for a 400px viewer container wastes bandwidth and patience.
Cost and ROI: Is 360-Degree Photography Worth It?
Let us break down realistic costs for an in-house setup:
| Component | Approximate Cost |
|---|---|
| Camera body (mid-range) | $1,500–$2,000 |
| Macro/prime lens | $400–$1,200 |
| Motorized turntable | $500–$2,500 |
| Lighting (2 LED panels + softboxes) | $300–$800 |
| Backdrop / light tent | $50–$200 |
| Software (Lightroom/Capture One) | $10–$20/month |
| Total initial investment | $2,760–$6,720 |
Ongoing per-product cost (labor + processing): $5–$30 per SKU depending on complexity and automation level.
Compare that to the impact: a 27% average increase in add-to-cart rate and a 50% reduction in returns for products with 360 views (data from Shopify Plus case studies). For a store with 1,000 SKUs averaging $50 per product, even a modest 5% conversion lift can generate tens of thousands of dollars in additional annual revenue.
The ROI is clear.
Advanced Techniques: Going Beyond the Spin
Hotspots and Annotations
Some viewers (Sirv, custom Three.js builds) allow clickable hotspots on specific frames. For example, a hotspot on frame 12 of a laptop spin could open a tooltip explaining the port layout on the left side.
Video-Based 360
Instead of image sequences, you can record a smooth video of the turntable rotation and use a JS player that scrubs through the video based on drag input. This approach yields smoother motion but offers less control over individual frame quality.
3D Model Rendering
For products already modeled in 3D (furniture, industrial parts, consumer electronics), rendering 360 frames from a 3D model eliminates the photo shoot entirely. Tools like Blender, KeyShot, or Adobe Substance 3D Stager can produce photorealistic frames that are indistinguishable from photographs.
Conclusion: Elevate Your Product Visuals
360-degree product packshots are one of the highest-impact investments an e-commerce business can make. They reduce returns, increase conversions, improve engagement, and differentiate your store from competitors still relying on static images.
The technical workflow—shoot, process, optimize, integrate—is well within reach for any team willing to invest in the right equipment and methodology. From choosing the correct frame count to optimizing WebP sprite sheets for a lightning-fast viewer, every detail matters.
If you want expert guidance on creating 360-degree packshots and integrating them seamlessly into your PrestaShop or WordPress store, Lueur Externe has been helping businesses build high-performance e-commerce experiences since 2003. Our team combines photography expertise, certified PrestaShop development, AWS infrastructure, and advanced SEO to deliver results that look stunning and load fast.
Get in touch with Lueur Externe to discuss your 360-degree product photography project and take your online store to the next level.