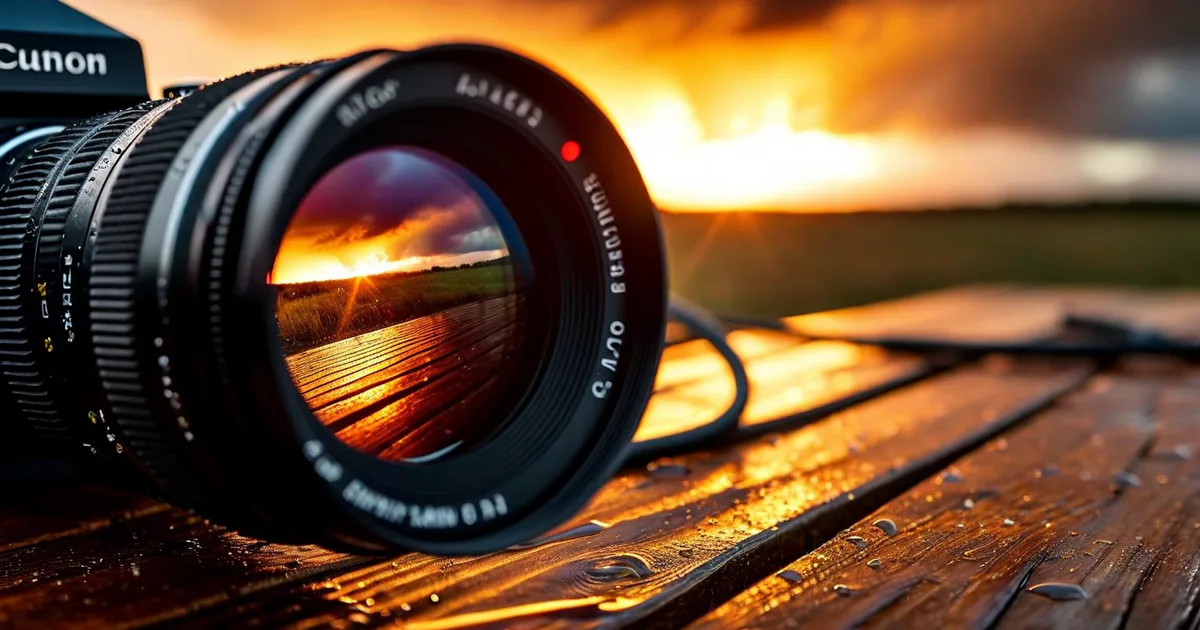
Why Filming on Location Still Matters in 2025
Studio shoots offer control. Green screens offer flexibility. But there is something about real-world locations—a crumbling industrial warehouse, a sunlit olive grove in the south of France, a bustling city intersection—that no amount of post-production wizardry can replicate.
Filming on location delivers authenticity. It anchors your story in a tangible place, gives actors and presenters real environments to react to, and provides production value that would cost a fortune to recreate on a soundstage. According to a 2024 report by the Association of Film Commissioners International (AFCI), over 68% of independent productions and 45% of major studio projects now incorporate significant location work.
But authenticity comes with a price: unpredictability. Light changes by the minute. An airplane roars overhead during a quiet dialogue scene. A sudden rainstorm turns your golden hour into a grey hour. This guide breaks down the three pillars of successful location filming—light, sound, and contingency planning—with actionable strategies you can apply to your next shoot.
Managing Light on Location
Light is the single most defining element of your image. In a studio, you flip a switch. On location, you negotiate with the sun.
Understanding the Sun’s Schedule
Every outdoor shoot should begin with a sun chart. Apps like Sun Surveyor and PhotoPills let you preview the sun’s arc across your exact location for any date and time. This is not optional—it is foundational.
Here is a practical breakdown of outdoor lighting conditions throughout the day:
| Time of Day | Light Quality | Color Temperature | Best For |
|---|---|---|---|
| Pre-dawn (blue hour) | Soft, diffused blue | ~7,000–10,000K | Moody establishing shots, atmospheric B-roll |
| Golden hour (sunrise) | Warm, directional, low angle | ~3,000–4,000K | Interviews, beauty shots, emotional scenes |
| Mid-morning | Neutral, moderate shadows | ~5,200–5,500K | General coverage, dialogue scenes |
| High noon | Harsh, top-down, strong shadows | ~5,500–6,500K | Avoid for faces; acceptable for wide shots |
| Afternoon | Transitional, shifting angles | ~5,000–5,500K | Action sequences, B-roll |
| Golden hour (sunset) | Warm, dramatic, low angle | ~3,000–4,000K | Hero shots, emotional peaks, wrap-up scenes |
| Twilight (blue hour) | Soft blue, fading fast | ~7,000–10,000K | Establishing shots, timelapse |
The takeaway: schedule your most important scenes during golden hour. You get roughly 45–60 minutes of usable golden-hour light depending on latitude and season. In the Alpes-Maritimes region of southern France, for example, summer golden hour can stretch to nearly 70 minutes thanks to the Mediterranean latitude—a fact the team at Lueur Externe regularly leverages when producing visual content for clients.
Shaping Available Light
You cannot move the sun, but you can redirect it.
- Reflectors (5-in-1 kits): A 42-inch 5-in-1 reflector costs under $40 and gives you silver (hard bounce), gold (warm bounce), white (soft fill), black (negative fill), and translucent (diffusion). This single tool solves most outdoor lighting problems.
- Diffusion frames (silks): A 4×4-foot or 6×6-foot silk frame placed between the sun and your subject turns harsh midday light into soft, flattering illumination. Larger frames (8×8 or 12×12) are standard on professional sets.
- Negative fill: Sometimes the problem is too much fill light. A black flag or floppy on the shadow side deepens contrast and adds dimension.
- Portable LEDs: Panels like the Aputure 300d Mark II (300W, daylight-balanced, ~72,000 lux at 1 meter) can compete with direct sunlight for close-up work. Budget alternatives like the Godox SL-150W (~47,000 lux at 1 meter) offer strong value.
Dealing with Changing Cloud Cover
This is the classic location headache. The sun ducks behind a cloud mid-take, and suddenly your image shifts by 2+ stops.
Solutions:
- Shoot with a slightly wider aperture than your meter reading and adjust in post (shoot RAW or log profiles like S-Log3, C-Log, or V-Log).
- Assign a crew member to cloud watch—literally calling out incoming cloud cover so the DP can anticipate exposure shifts.
- Use ND (neutral density) filters that can be quickly added or removed. Variable NDs (like the Tiffen Variable ND) allow continuous adjustment without swapping glass.
- If continuity matters, commit to overcast: use a large silk to create consistent diffusion regardless of cloud movement.
Capturing Clean Sound on Location
Here is an industry truth that surprises many newcomers: audiences will tolerate imperfect visuals, but they will not tolerate bad audio. A 2022 study by the University of Southern California’s School of Cinematic Arts found that viewers rated overall production quality 62% lower when audio was degraded, even when the image quality remained identical.
On location, sound is your most vulnerable element.
The Three-Layer Sound Strategy
Professional location sound engineers use a layered approach:
- Primary microphone (boom/shotgun): A shotgun mic like the Sennheiser MKH 416 or Rode NTG5 mounted on a boom pole, positioned just out of frame, pointed at the speaker’s chest or chin. This captures the most natural-sounding dialogue.
- Secondary microphone (lavalier): A wireless lav system (Sennheiser EW 112P, Sony UWP-D21, or DJI Mic 2) clipped inside the talent’s clothing. This provides a backup and a closer, more isolated dialogue track.
- Ambient/wild tracks: After each scene or setup, record 30–60 seconds of pure ambient sound (room tone) with everyone silent. This gives your editor seamless material for patching gaps and smoothing transitions.
Common Location Sound Enemies (and How to Beat Them)
- Wind: Even a light 10 mph breeze creates low-frequency rumble that can destroy a take. Use foam windscreens as a baseline, then add a furry windshield (“dead cat”) for anything above 5 mph. For extreme conditions, a blimp/zeppelin housing (like the Rycote Cyclone) is the gold standard.
- Traffic noise: Schedule dialogue-heavy scenes during low-traffic windows (early morning, late evening). Use directional mics aimed away from traffic. In post, tools like iZotope RX 11 can perform near-miraculous noise reduction, but prevention is always better.
- Aircraft: Near airports or military bases, you may lose 2–3 minutes per flyover. Factor this into your schedule. A professional AD (assistant director) should log flyover patterns during the scout.
- HVAC and electrical hum: Even outdoors, nearby buildings can generate hum from air conditioning units and transformers. Walk the perimeter during your scout with headphones and a recorder.
- Crowds and bystanders: If shooting in public spaces, establish a perimeter with PAs (production assistants). For critical dialogue, consider recording a “wild line” (the actor repeating the line cleanly after the visual take) as a safety.
A Quick Reference: Microphone Selection by Scenario
Scenario                  | Primary Mic         | Backup Mic        | Notes
--------------------------|---------------------|-------------------|---------------------------
Outdoor interview         | Shotgun on boom     | Wireless lav       | Dead cat required
Walking & talking         | Wireless lav        | Shotgun on boom    | Boom follows movement
Crowded public space      | Wireless lav        | Shotgun close      | Post-production NR likely
Interior (no HVAC ctrl)   | Shotgun on boom     | Wireless lav       | Kill HVAC if possible
Car interior              | Lav on visor/talent | Plant mic on dash  | Record car engine wild
Narration / voice-over    | Large diaphragm condenser (studio) | —    | Record in controlled space
Handling Unexpected Challenges
Every location shoot has a moment where the plan meets reality. The best productions are not the ones that avoid problems—they are the ones that recover fastest.
Weather Disruptions
Weather is the number-one production disruptor on location. A 2023 survey of 400 production managers by ProductionHUB found that 37% of location shoots experienced at least one weather-related delay, with an average cost of $8,500 per delay day for mid-budget productions.
Mitigation strategies:
- Build at least one weather cover day into your schedule.
- Prepare a cover set—a nearby interior location where you can shoot alternative scenes if weather shuts down exteriors.
- Carry waterproof covers (rain sleeves) for all camera and sound equipment. A $15 camera rain cover can protect a $5,000 body and lens.
- Use hyper-local weather apps (Windy, Weather Underground) that update every 15 minutes rather than relying on daily forecasts.
Permit and Legal Issues
Shooting without proper permits can result in fines, confiscated footage, or forced shutdown. In cities like Los Angeles, permit fees range from $625 to over $3,000 per day. In France, filming permits (autorisations de tournage) vary by municipality but typically require 2–4 weeks of advance notice.
Checklist:
- Confirm filming permits with local authorities.
- Secure location releases signed by property owners.
- Obtain talent releases for anyone appearing on camera.
- Verify insurance coverage (general liability, equipment, errors & omissions).
- Confirm drone regulations if aerial footage is planned (EU drone operator registration is mandatory under EASA rules).
Equipment Failures
Murphy’s Law hits hardest on location, far from the nearest rental house.
- Bring redundancy for critical gear. Two camera bodies, two audio recorders, spare batteries at 200% of estimated need.
- Carry a field repair kit: gaffer tape, multi-tool, lens cleaning supplies, spare cables (XLR, HDMI, SDI), spare memory cards.
- Test all equipment the night before. Format cards in-camera, charge every battery, run a 30-second test recording on every mic channel.
Crowd Control and Continuity
In public spaces, bystanders inevitably wander into frame, stare at the camera, or attempt to interact with talent.
- Use PAs with polite but firm communication to create a buffer zone.
- Plan camera angles that minimize public foot traffic in the background.
- For wide establishing shots, consider scheduling during off-peak hours (before 8 AM or after 7 PM).
- Maintain a continuity log: photograph wardrobe, prop placement, and light direction after every setup. Continuity errors multiply on location because setups are often shot non-sequentially across different days and conditions.
Post-Production: Rescuing Location Footage
Even with perfect planning, location footage often needs extra attention in post.
Color Correction
Mixed lighting (daylight + tungsten storefronts, for example) requires careful color grading. Shooting in a flat or logarithmic profile gives you maximum latitude. Tools like DaVinci Resolve (free version available) offer professional-grade color correction that can match shots taken hours apart under different lighting conditions.
Audio Cleanup
Location audio almost always benefits from:
- Noise reduction (iZotope RX, Adobe Podcast AI)
- EQ adjustment to roll off low-frequency rumble (<80 Hz)
- Compression to even out dialogue levels between the boom and lav tracks
- Room tone fill to smooth edits and remove awkward silences
Stabilization
Handheld location footage often needs post-stabilization. Adobe Premiere’s Warp Stabilizer and DaVinci Resolve’s built-in stabilizer handle moderate shake. For heavier correction, dedicated tools like Gyroflow (open source, using gyroscope data) can produce gimbal-like results.
Building a Location Shoot Checklist
After years of producing content for clients across industries—from e-commerce product videos to brand documentaries—the content creation team at Lueur Externe has refined a pre-shoot checklist that dramatically reduces on-set surprises. Here is a condensed version:
- Location scouted in person (not just Google Maps)
- Sun path analyzed for shoot date and time
- Sound environment assessed with headphones
- Permits obtained and copies on-set
- Location and talent releases signed
- Weather forecast monitored (48-hour and day-of)
- Cover set or interior backup identified
- All equipment tested and packed with redundancy
- Batteries charged to 100%, spares packed at 200% of need
- Call sheet distributed with contact numbers, map, parking info
- Continuity log and shot list printed (yes, printed—phones die)
- Catering and water arranged (a fed crew is a functional crew)
The Difference Between Amateur and Professional Location Work
Anyone can set up a camera in a beautiful location. The difference between amateur and professional location work is anticipation. Professionals anticipate the light shift, the sound problem, the permit question, and the equipment failure before they happen.
This mindset extends beyond film sets. At Lueur Externe, we apply the same rigorous planning philosophy to every content creation project—whether it is a product video shoot, a website redesign, or an SEO strategy. Since 2003, our team in the Alpes-Maritimes has understood that great digital content requires both creative vision and methodical execution.
Conclusion: Plan Relentlessly, Adapt Instantly
Filming on location is simultaneously one of the most rewarding and most demanding aspects of content creation. The light is real, the sound is alive, and the environment tells a story that no studio can replicate. But without disciplined planning around light management, sound capture, and contingency strategy, that authenticity can quickly become chaos.
To recap the essentials:
- Light: Schedule around golden hour, shape available light with reflectors and diffusion, and always shoot in a flexible format (log or RAW).
- Sound: Use a layered microphone strategy, record room tone, and never underestimate wind.
- Contingency: Build weather days into your schedule, carry redundant gear, and prepare cover sets.
Whether you are producing your first brand video or managing a multi-day commercial shoot, the principles in this guide will help you deliver professional results regardless of what the location throws at you.
Need help planning and producing high-quality video content or building a digital strategy that showcases it? The team at Lueur Externe combines creative content expertise with deep technical knowledge in web development, SEO, and digital performance. Get in touch with us today to discuss your next project.