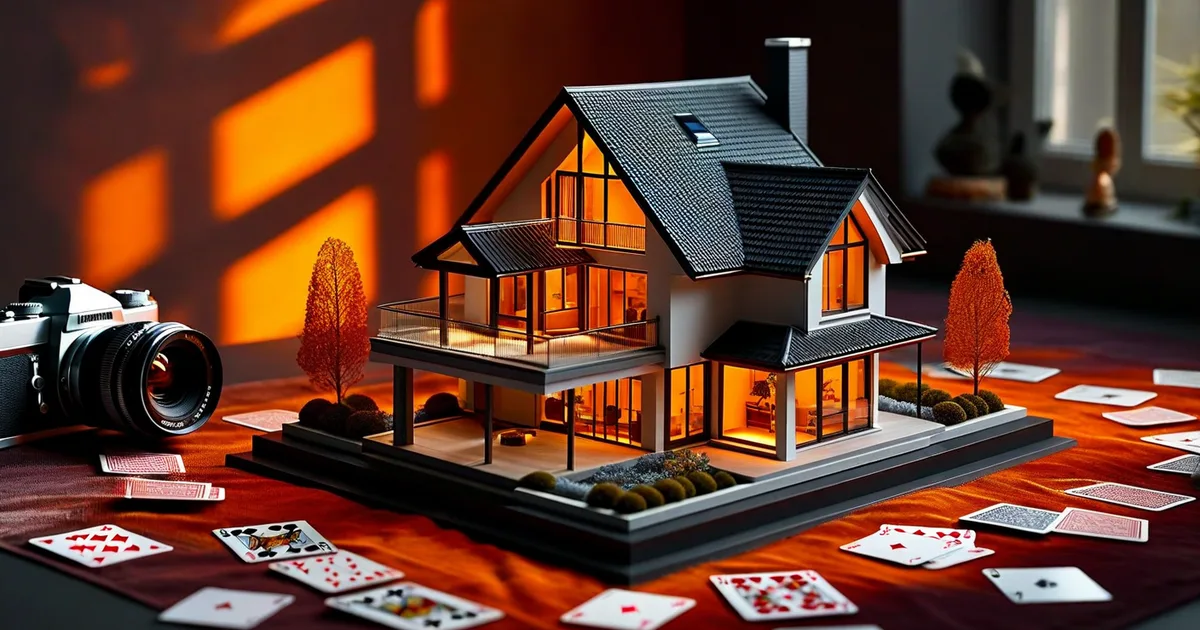
Why Real Estate Photography Matters More Than Ever
In 2024, over 97% of home buyers begin their property search online. That means the first impression of any listing isn’t a handshake at the door — it’s a photograph on a screen. And that first impression happens in under 3 seconds.
The numbers speak for themselves:
- Listings with professional photos sell 32% faster (Redfin, 2023)
- Homes with high-quality images sell for up to 47% more than comparable listings with amateur photos (Wall Street Journal)
- Properties with 20+ photos get 2x more online views than those with fewer than 10 (Zillow)
Whether you’re a real estate agent building your brand, a property developer launching a new project, or a photographer expanding into this lucrative niche, mastering real estate photography — from capture to web delivery — is essential.
This guide covers everything: camera settings, lighting techniques, composition rules, editing workflows, and the critical but often overlooked step of web optimization.
Essential Equipment for Real Estate Photography
Camera Body
You don’t need the most expensive camera on the market, but you do need one that handles high dynamic range scenes well and produces clean files at base ISO.
Recommended options:
- Full-frame: Sony A7 IV, Nikon Z6 III, Canon R6 Mark II
- Crop-sensor (budget): Fuji X-T5, Sony A6700
- Key specs to prioritize: Dynamic range (12+ stops), reliable autofocus, weather sealing
Lenses
The lens matters more than the body in real estate photography.
| Lens Type | Focal Range | Best Use Case | Price Range |
|---|---|---|---|
| Ultra-wide zoom | 14-24mm (FF) / 10-18mm (APS-C) | Interiors, small rooms | $800 - $2,500 |
| Standard zoom | 24-70mm (FF) | Details, exteriors | $900 - $2,300 |
| Tilt-shift | 17mm or 24mm | Verticals correction, luxury | $1,400 - $2,200 |
| Drone (built-in) | 24mm equiv. | Aerials, site context | $800 - $3,000 |
The 16-35mm f/4 (or equivalent) is the workhorse lens for 80% of real estate work. It’s wide enough to capture full rooms without the extreme barrel distortion of fisheye lenses.
Tripod and Accessories
- A sturdy tripod with a ball head (minimum load capacity: 8kg)
- Remote shutter release or 2-second timer to eliminate camera shake
- External speedlight (e.g., Godox V1) for flash-ambient blending
- Color checker card for accurate white balance across mixed lighting
Shooting Techniques That Make Properties Shine
Camera Settings for Interiors
Consistency is key. Here’s a reliable starting point for interior real estate shots:
Mode: Manual (M) or Aperture Priority (A/Av)
Aperture: f/7.1 - f/9 (sweet spot for sharpness + depth of field)
ISO: 100 - 320 (keep it low for clean files)
White Balance: 4500K - 5500K (or custom with color checker)
Shutter Speed: Determined by ambient (typically 1/4s to 2s on tripod)
Bracketing: 3-5 shots at 2EV intervals for HDR
File Format: RAW (always)
The One-Point Perspective Rule
The most impactful composition technique in real estate photography is one-point perspective — aligning the camera with the center of a wall so that all horizontal and vertical lines converge naturally.
Steps:
- Position the tripod at chest height (approximately 1.2-1.5 meters)
- Center the camera in the room, facing the far wall
- Level the tripod using a bubble level or in-camera electronic level
- Keep the camera perfectly horizontal — zero tilt up or down
- Frame so that you show two walls and the floor
This technique makes rooms feel balanced, spacious, and professional. Tilting the camera even 2-3 degrees creates converging verticals that make a space feel unstable.
HDR Bracketing: Taming Window Blow-Out
The biggest technical challenge in interior photography is dynamic range — specifically, the extreme difference between bright windows and darker room interiors. The human eye can see both clearly; a camera cannot in a single exposure.
Solution: HDR bracketing
- Set your camera to bracket 3-5 exposures at 2EV spacing
- Your sequence might be: -4EV, -2EV, 0EV, +2EV, +4EV
- The darkest exposure captures window detail
- The brightest exposure captures shadow detail in dark corners
- Merge in post-processing for a naturally lit result
Pro tip: Avoid over-processed HDR that looks “radioactive.” The goal is a natural look where both interior and exterior are visible through windows, not a hyper-saturated cartoon.
Flash-Ambient Blending (The Professional Approach)
Many top real estate photographers have moved beyond pure HDR to flash-ambient blending, which produces cleaner, more three-dimensional results.
The workflow:
- Shoot an ambient exposure series (bracketed for HDR)
- Shoot 2-4 additional frames with a bounced flash aimed at different walls/ceilings
- In Photoshop, layer the flash frames over the ambient HDR base
- Use luminosity masks to blend naturally
This technique adds depth and dimension that pure HDR often lacks, creating photos that look closer to magazine editorial quality.
Twilight and Blue Hour Exteriors
Nothing sells a luxury property like a twilight shot — the exterior photographed during the 20-30 minute window after sunset when the sky turns deep blue and interior lights glow warmly.
Settings for twilight:
- Arrive 15 minutes before sunset to set up
- Turn on ALL interior and exterior lights
- Shoot at f/8, ISO 200-400
- Use a 2-8 second exposure depending on remaining light
- Bracket for safety
- The sweet spot is typically 15-25 minutes after sunset
Post-Processing Workflow for Real Estate Photos
Software Stack
Most professional real estate photographers use a combination of:
- Adobe Lightroom Classic — Initial culling, batch color correction, lens profiles
- Adobe Photoshop — HDR merging, flash blending, object removal, sky replacement
- Enfuse / Photomatix — Dedicated HDR merging (alternative to Photoshop)
- PTGui — Panoramic stitching for virtual tours
Step-by-Step Editing Process
- Import and cull — Select the best bracket set for each angle
- Lens correction — Apply profile + manual distortion/vignette fix
- Vertical alignment — Use Lightroom’s Transform tool or guided perspective
- HDR merge — Merge brackets (Lightroom Photo Merge HDR or Photoshop)
- White balance — Match to neutral reference or adjust to 4800-5200K
- Exposure and tone — Open shadows, pull highlights, maintain contrast
- Color grading — Slightly warm midtones, clean whites, vibrant greens for exteriors
- Retouching — Remove personal items, power cables, sensor spots
- Crop and straighten — Final composition adjustments
- Export — See web optimization section below
Batch Editing for Efficiency
A typical real estate shoot produces 25-40 final images. Efficiency matters.
Time benchmarks for professionals:
- Basic edit (exposure, WB, crop): 1-2 minutes per image
- HDR merge + advanced edit: 4-6 minutes per image
- Flash-ambient blend: 8-15 minutes per image
- Full shoot delivery (30 images): 2-4 hours total
Developing Lightroom presets for your typical scenarios (bright modern interior, dark traditional interior, exterior daylight, twilight) can cut editing time by 40%.
Web Optimization: The Missing Link
Here’s where many photographers and agencies drop the ball. You can capture and edit stunning real estate photos, but if they load slowly, aren’t properly structured for SEO, or display poorly on mobile, their impact is dramatically reduced.
At Lueur Externe, we’ve worked with real estate clients since 2003 and have seen firsthand how image optimization directly impacts listing performance and search rankings.
Image Sizing and Compression
Recommended export settings for web listings:

Full-size images:     2000px longest edge | WebP | Quality 80-85 | < 300KB
Thumbnails:           600px longest edge  | WebP | Quality 75    | < 50KB
OG/Social sharing:    1200x630px          | JPEG | Quality 85    | < 150KB
Hero/banner images:   2560px wide         | WebP | Quality 82    | < 500KB
WebP vs. JPEG: WebP delivers 25-35% smaller file sizes at equivalent visual quality. All modern browsers support it. Use JPEG as a fallback via the <picture> element.
SEO-Optimized Image Structure
Every property image should include:
- Descriptive filename:
3-bedroom-villa-pool-antibes-living-room.webp(notIMG_4582.jpg) - ALT text: “Spacious open-plan living room with sea view in 3-bedroom villa, Antibes”
- Title attribute: Optional but useful for accessibility
- Structured data: Use Schema.org
RealEstateListingwithimageproperty - Lazy loading:
loading="lazy"attribute on all images below the fold
Page Speed Impact
Google’s Core Web Vitals directly affect search rankings. For real estate listing pages:
| Metric | Target | Impact of Unoptimized Images |
|---|---|---|
| LCP (Largest Contentful Paint) | < 2.5s | Hero image often IS the LCP element |
| CLS (Cumulative Layout Shift) | < 0.1 | Images without dimensions cause shifts |
| FID/INP (Interaction) | < 200ms | Large images block main thread |
Always specify width and height attributes on image tags, or use CSS aspect-ratio to prevent layout shifts as images load.
Responsive Image Implementation
Here’s a code snippet for properly serving real estate photos across devices:
<picture>
  <source
    srcset="/images/properties/villa-antibes-living-2560w.webp 2560w,
            /images/properties/villa-antibes-living-1920w.webp 1920w,
            /images/properties/villa-antibes-living-1200w.webp 1200w,
            /images/properties/villa-antibes-living-800w.webp 800w"
    sizes="(max-width: 768px) 100vw, (max-width: 1200px) 80vw, 1200px"
    type="image/webp">
  <source
    srcset="/images/properties/villa-antibes-living-1920w.jpg 1920w,
            /images/properties/villa-antibes-living-1200w.jpg 1200w,
            /images/properties/villa-antibes-living-800w.jpg 800w"
    sizes="(max-width: 768px) 100vw, (max-width: 1200px) 80vw, 1200px"
    type="image/jpeg">
  <img
    src="/images/properties/villa-antibes-living-1200w.jpg"
    alt="Open-plan living room with panoramic sea views in luxury Antibes villa"
    width="1200"
    height="800"
    loading="lazy"
    decoding="async">
</picture>
This approach serves appropriately-sized images to every device, saving mobile users from downloading 2MB desktop images on cellular connections.
Virtual Tours and Interactive Media
Static photography remains the foundation of property listings, but interactive experiences increasingly separate top listings from the competition.
360° Virtual Tours
Platforms like Matterport, Ricoh Theta, and insta360 enable immersive 3D walkthroughs. Key considerations:
- Capture resolution: Minimum 8K for comfortable viewing
- Hosting: Dedicated platforms (Matterport) vs. self-hosted (Pannellum.js)
- SEO benefit: Virtual tours increase time-on-page by 5-10x
- Conversion impact: Listings with virtual tours receive 87% more views (Matterport, 2023)
Video Walkthrough Best Practices
- Keep property videos between 60-120 seconds
- Shoot at 4K/24fps for a cinematic feel
- Use a gimbal for smooth motion
- Include aerial transitions between exterior and interior
- Optimize video thumbnails — they appear in Google search results
Drone Photography: Regulations and Techniques
Aerial photography provides critical context — lot size, neighborhood, proximity to amenities, and overall property scale.
Legal Requirements (EU/France Example)
- Register your drone with aviation authority (DGAC in France)
- Complete open category training (A1/A3 minimum)
- Maintain visual line of sight
- Respect no-fly zones (airports, military, national parks)
- Check prefectural restrictions for urban areas
- Obtain authorization for flights over populated areas (A2 category or specific authorization)
Best Drone Shots for Real Estate
- Straight-down (nadir): Shows lot boundaries and landscaping
- 45-degree elevated: The classic “hero shot” showing the property in context
- Orbit: A slow 360° circle around the property
- Reveal: Start on a detail, pull back to reveal the full property
- Neighborhood context: Higher altitude showing schools, parks, coastline
Staging and Preparation Checklist
Great photography starts before you press the shutter. Here’s a pre-shoot checklist that separates amateurs from professionals:
Exterior:
- Mow lawn, trim hedges, clear pathways
- Remove cars from driveway
- Turn on exterior lights (even during day — warmth in windows)
- Hide bins and garden tools
- Power wash deck/patio if time allows
Interior:
- Declutter every surface — less is more
- Remove personal photos and religious items
- Replace burned-out bulbs (consistent color temperature: 3000-4000K)
- Open blinds and curtains fully
- Close toilet lids
- Style beds with fresh, neutral linens
- Add fresh flowers or greenery in living areas
- Remove fridge magnets and papers
- Hide electrical cables where possible
Common Mistakes to Avoid
- Shooting at eye level — Camera height should be 1.2-1.5m, not 1.7m
- Using a fisheye lens — Ultra-wide is fine; barrel distortion is not
- Ignoring vertical lines — Converging verticals make rooms feel like they’re falling
- Over-editing HDR — If it looks “HDR,” you’ve gone too far
- Including yourself in mirrors — Check every reflective surface
- Neglecting web optimization — A beautiful photo that takes 8 seconds to load is a liability
- Inconsistent white balance — Mixed lighting (daylight + tungsten) requires careful correction
- Forgetting the context — Include neighborhood, street view, and amenity proximity shots
Measuring Success: Analytics for Property Listings
How do you know your photography is working? Track these metrics:
- Time on listing page — Good photos increase dwell time by 60%+
- Photo gallery engagement — How many images do visitors scroll through?
- Inquiry rate — Percentage of viewers who request a showing
- Days on market — The ultimate KPI for listing photography
- Social sharing — Beautiful photos get shared, expanding organic reach
The team at Lueur Externe helps real estate agencies build listing platforms that integrate these analytics directly into their CMS, providing actionable insights on which photography styles and compositions drive the most engagement for their specific market.
The Business Case: ROI of Professional Real Estate Photography
Let’s put concrete numbers to the investment:
- Average professional shoot cost: €150-€400 (depending on property size and deliverables)
- Average price increase for professionally photographed homes: 1.47x listing price potential
- Average time reduction to sale: 32% faster
- Cost per additional view: Effectively €0.02-€0.05 when photos drive organic traffic
For a €500,000 property, even a 1% price improvement justified by better presentation equals €5,000 — a 12-25x return on the photography investment.
Conclusion: From Capture to Conversion
Real estate photography is a technical discipline, a creative art, and — critically — a digital marketing challenge. The best photograph in the world means nothing if it’s buried on a slow-loading page that Google can’t index properly.
The full pipeline matters: capture (proper equipment, lighting, composition) → edit (HDR blending, color correction, retouching) → optimize (compression, responsive delivery, SEO structure) → present (fast website, intuitive gallery, mobile-first design).
Mastering each link in this chain is what separates listings that languish online from those that generate immediate interest and sell above asking price.
If you’re building or improving a real estate platform and need expert guidance on web performance, image optimization, or SEO strategy, Lueur Externe brings over 20 years of web development expertise — including certified solutions architecture and deep technical SEO knowledge — to help your property listings perform at their peak. Get in touch today to discuss your project.